With each year, the number of people using mobile and web apps is rising. Because of this, there’s an increasing need for app content translated into different languages to reach as many people as possible.
This article will review some of the non-trivial reasons for localizing an app, several tools and approaches to it, and offer an easy solution for React Native using Google Sheets.
👍 Reasons to localize your app
While the most obvious reason for translating the app content into different languages is to reach new audiences, reasons to localize your app are not limited just to this. Moreover, there are some benefits of app localization even if you’re using only 1 language within the application:
- Text content management. This means that content makers or business owners would be able to change/translate texts directly, without having to get in touch with the developers.
- Avoiding duplication of text content. This is especially relevant when you build native iOS and Android apps that share the same UI, but different codebases.
- Content synchronization. This means that, with the right tool, you’ll be able to change the text content of the app without rolling out a new build to the stores. Thus, your users will see changes immediately and without the need to update the application.

Image by Oleksandr Kaliberda
If you understand what benefits the app localization will give you, head over to the next section, where we’re going to outline some of the main ways to implement localization.
🛠 Main approaches to implementing localization
Repository localizations
The simplest solution to implement localization is to store the locale files inside the repository itself, for example, in the JSON format. This way, you’ll have files like en.json, nl.json, de.json inside some folder.
Pros:
- Totally free.
- Simple to implement.
Cons:
- Hard to change the content for content managers, who’ll either have to get in touch with the developers or learn how to work with Git and code editing.
- Impossible to implement real-time content synchronization.
Localization platforms & tools
A common approach to localization is to use a localization platform that will manage & store the texts on a remote server. Most of the platforms already provide such functionality as repository linking, collaboration tools, 2-way synchronization of the translations, cross-platform integrations etc.
In this section, we’re going to review some of the most popular platforms and give their specific features:
Localazy
- Has OTA (over-the-air) capabilities.
- Has a free tier of 200 keys (terms).
- Has an impressive list of integrations {target=_blank rel="nofollow noopener"}, which includes React, Vue, Angular and other less popular frameworks, as well as most of the major repository hosting services and localization file formats.
- Has a sophisticated review system with different versions of translations.
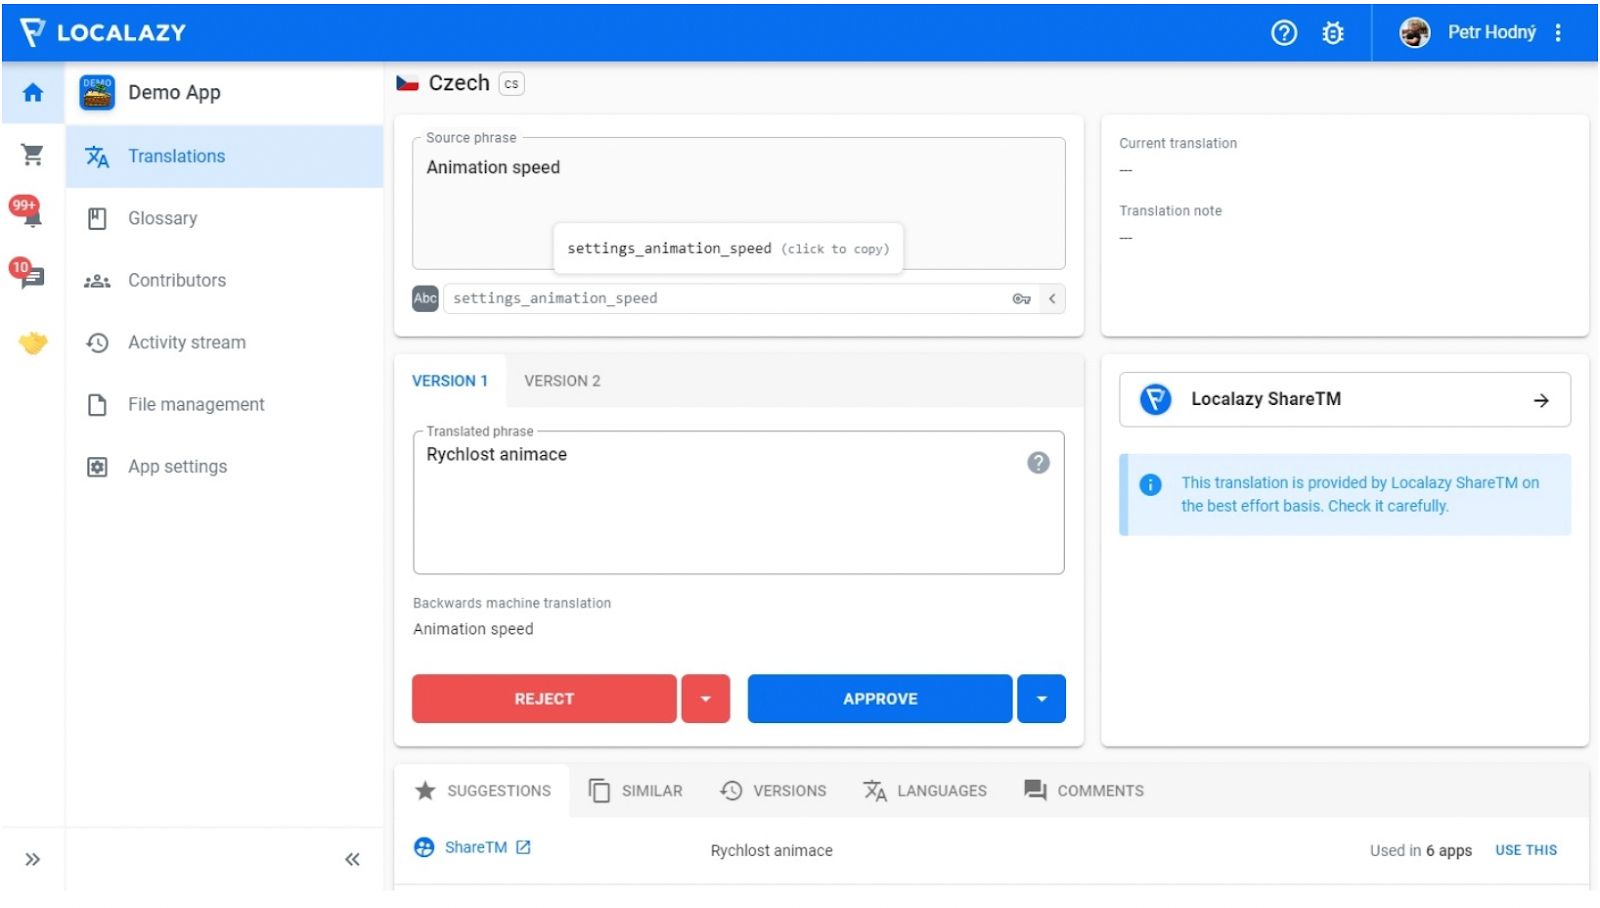
Localazy's interface
Lokalise
- Has OTA capabilities.
- Has built-in localization version control.
- Has support for managing plurals.
- There’s an ability to assign and manage localization-related tasks.

Lokalise's interface
Phrase
- Has OTA capabilities.
- Has numerous integration options.
- Has an in-context editor, where you can see the context of the translation.
- There’s an option to work on different branches, which is good for larger projects.
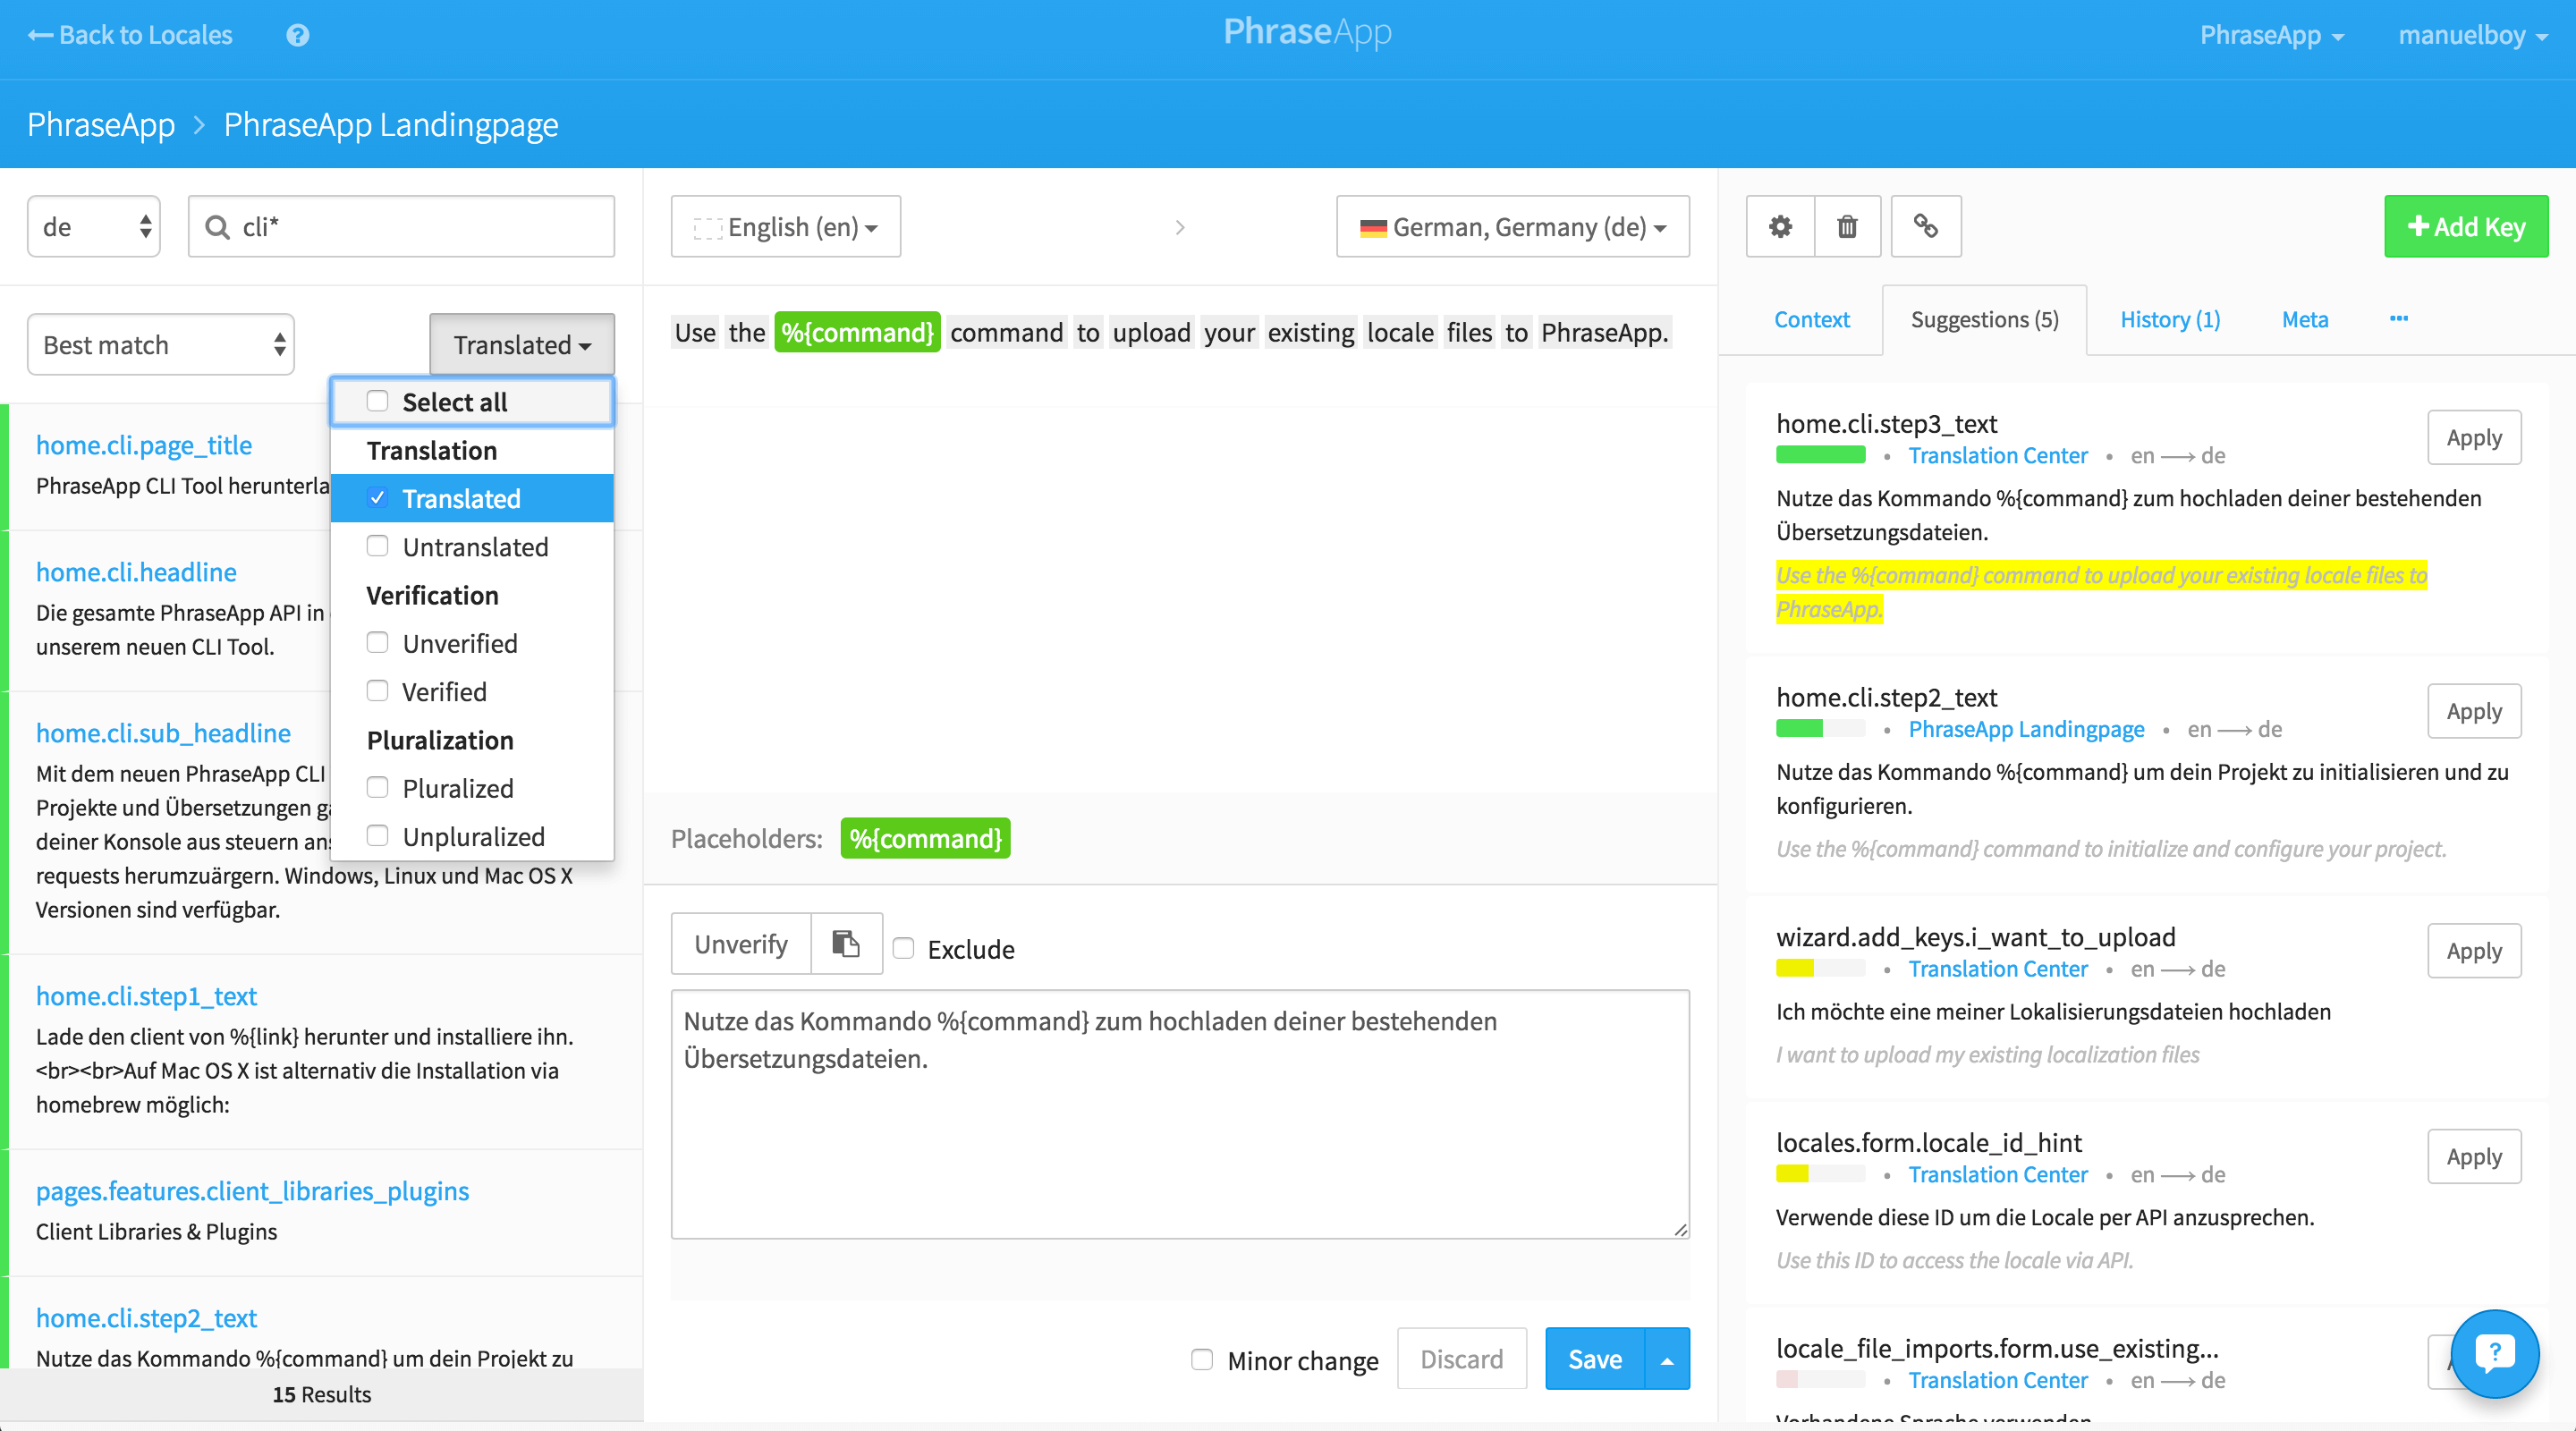
Phrase's interface
POEditor
- Has a nice free plan of 1000 strings.
- Collaborators can leave comments for each string.
- There’s a straightforward flow of file synchronization via webhooks as well as on demand.
- Saves translation history.
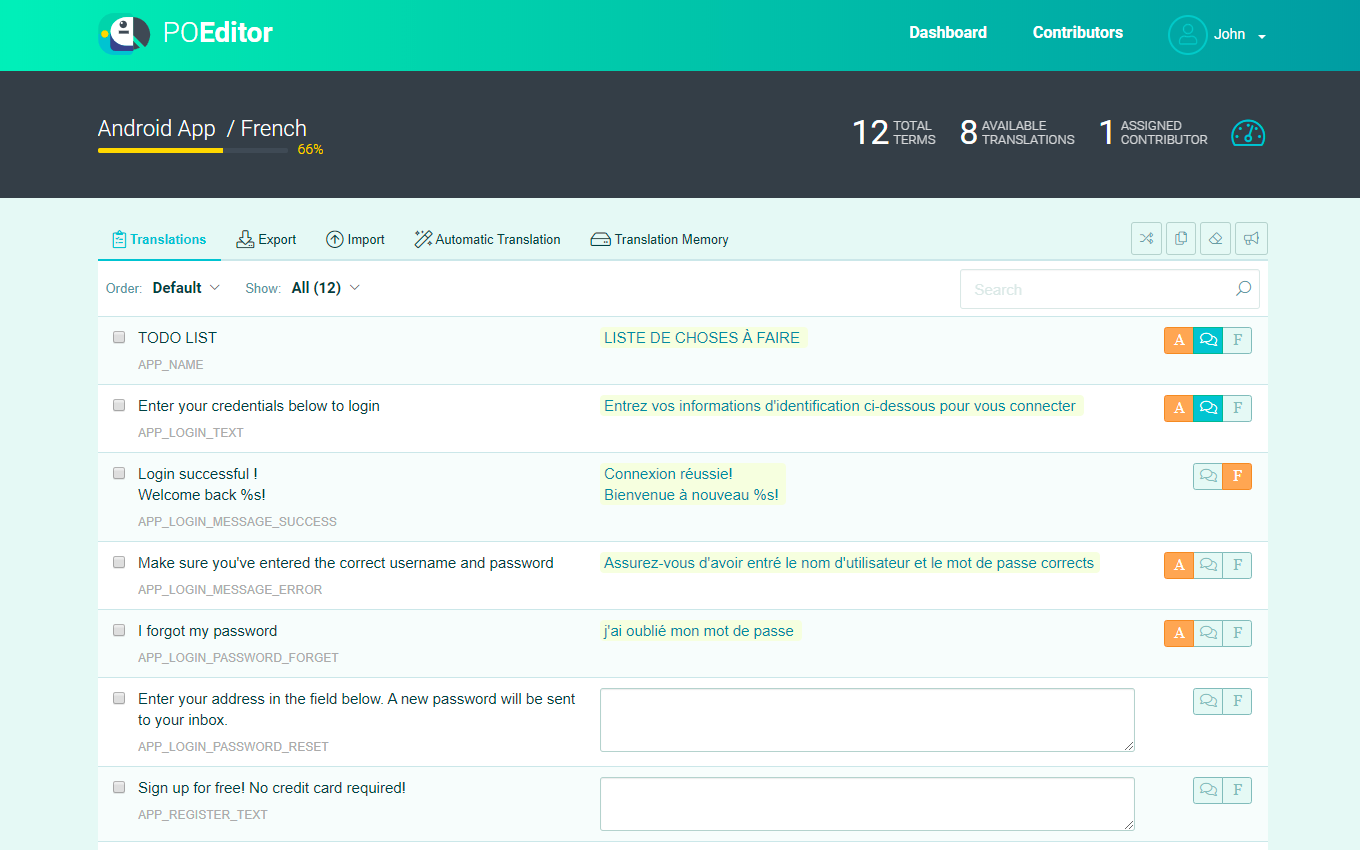
POEditor's interface
So, let’s outline some of the general pros & cons of using a localization platform:
Pros:
- Depending on the tool you choose, you can have any level of customizability for the content.
- A direct way to change the localizations.
- Ability to contact tech support in case you face any issues.
Cons:
- Often not free, or only with a free trial / limited number of localization keys.
Google Sheets
Another solution is to use Google Sheets or something similar to store & edit the translations there.
Pros:
- Completely free.
- Easy to use for the content makers, because most people are already familiar with spreadsheets.
- Depending on the library you use, OTA content synchronization may be possible (though our library doesn’t have this option).
- Google Sheets functionality allows you to create protected ranges, so that only specific people can edit some language columns.
- Ability to leave comments.
- Built-in version control from Google Sheets.
Cons:
- No branching support (unless you create a sheet for each branch).
- Doesn’t have integration libraries for less-popular tech stacks.
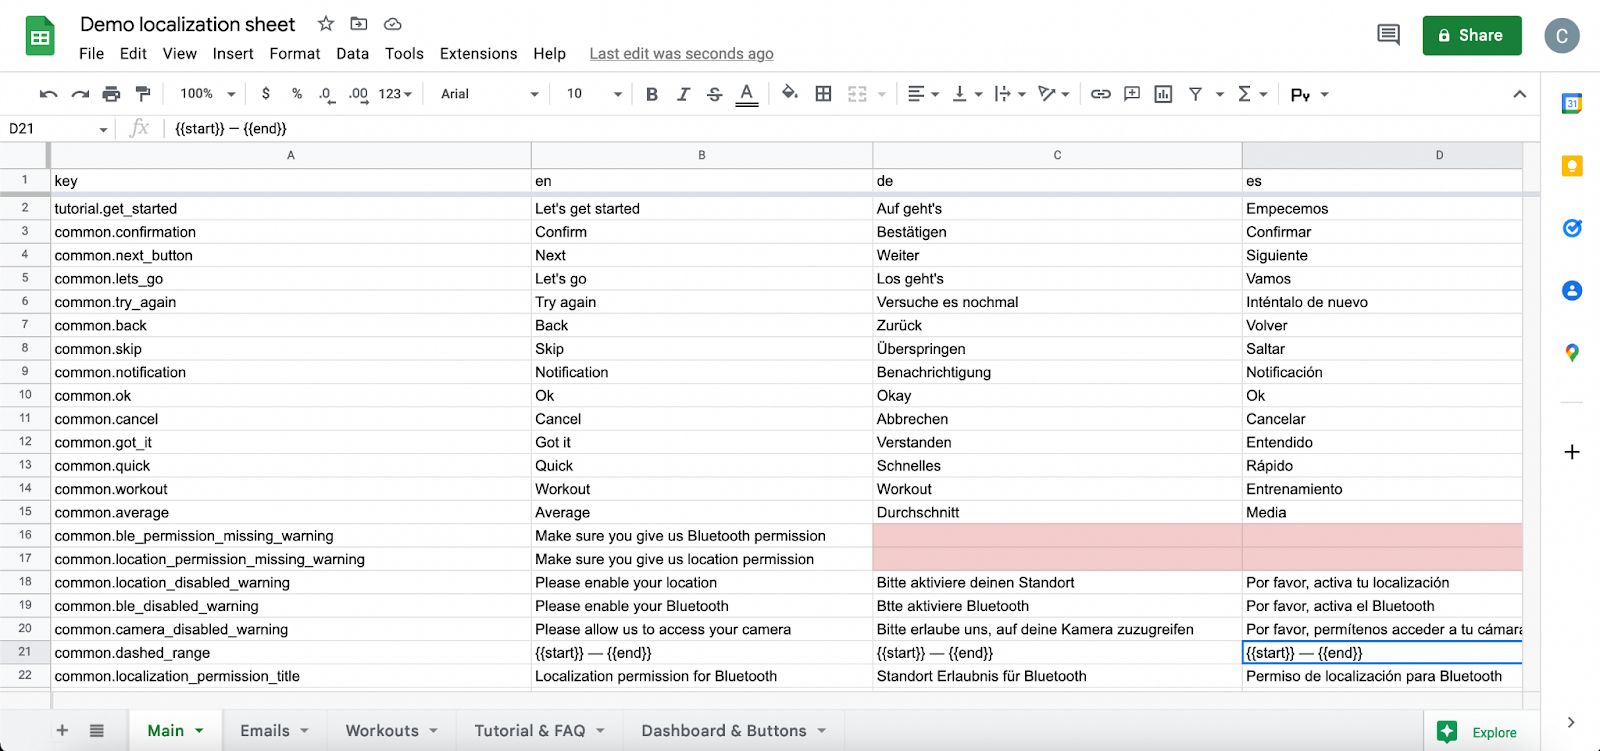
Example of localization using Google Sheets
⚙️ Implementation with Google Sheets, React Native, and i18n
In some of our recent projects, we started using Google Sheets for localization — take a look at our Norsk Guardian project, which is a React Native app for checking the status of BLE-integrated batteries. To make this possible, we developed a library called [google-sheets-localization-helpers]{target=_blank rel="nofollow noopener"}, which you can also use in your own projects.
Now, we’re going to outline the main steps to implement localization with Google Sheets & React/React Native.
Step 1: Creating the spreadsheet & installing the dependencies
First of all, we need to create the spreadsheet itself, and get an API key in Google Console for that account (to get the key follow these steps). Let’s set up the following sheet structure with three languages and one tag column (will be used in the code):
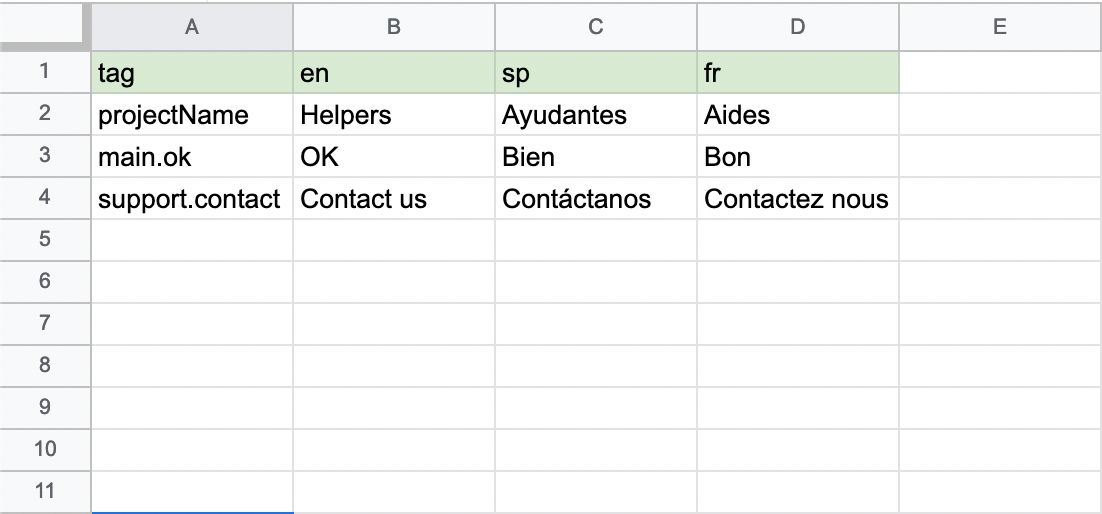
Structure example
To use the data from the sheet in your React Native app you first need to install the dependencies:
Step 2: Pulling the translations
Then, we’re going to set up a script that we can use to pull the translations from the sheet. Let’s call it syncLocales.ts and put it into the root of the project:
Here, you’ll need to configure the folder where the locale jsons will be saved. For our example, it would be in /src/strings. Also, you need to add GCP_API_KEY to your .env variables, as well as provide a value to the sheetId constant (the id can be found in the sheet URL).
Next, let’s set up calling this script automatically when the project is built. Go to package.json and add the following lines to the scripts field:
If you already have the postinstall key, you can just add && yarn localize to it. This way, the script will be called every time the project is built or a new dependency is installed, while also being able to pull the texts ad-hoc (i.e. after updating the sheet) by calling yarn localize.
Step 3: Using the locales in the application
The last remaining thing is to actually use these locales in the app. To do that, we’re going to use react-i18next. Let’s set up a file called i18next.ts and put the following code into it:
Here, you’ll probably want to configure the languages that you import, and the fallback language.
Now, import this file in App.tsx and we’re all set!
You can now use the translations in your components by getting the t function from useTranslation hook in the following way:
For more information on how to change the languages, as well as to get the language of the user device, please refer to react-i18next documentation.
💡 Takeaways
Now, let’s summarize some of the main ideas of the article:
- There are many reasons for implementing app localization besides reaching new audiences: text content management, avoiding duplication in code, and content synchronization.
- A good way to implement localization is to use one of the localization platforms, though this might be an overkill for smaller projects.
- A simple yet effective solution is to use Google Sheets for managing text content.
So, this is it! We hope you’ve liked the article, and in case you need any help with building localized Mobile or Web apps, feel free to reach out!

![Stormotion client Alexander Wolff, CPO from [object Object]](/static/a16ba3c9580effc3ab9a68d115eadffe/b0e74/alex.png)


