


The demand for convenient and personalized solutions transforms the fitness app market, sparking interest in how to build an app for fitness devices, as now more people prefer exercising at home with their choice of equipment to maintain their physical health.
What if your React Native fitness app could seamlessly connect with any smart device, turning your app into a workout companion? Most companies struggle with this, but in this guide, we’ll reveal how to develop it with ease.
Fitness Apps - Global Strategic Business Report by Global Industry Analysts, Inc. states that the worldwide size of the fitness app market reached $12.1 billion in 2024, and it’s going to reach $25.8 billion in 2030.
According to Statista, 901.4 million users worldwide have used fitness apps in 2024. And this number is expected to grow to 1,048 million by 2028. We think that this exponential market growth is a compelling motivation to develop a React Native companion fitness app.
Today, more and more equipment for workouts has Bluetooth in place. This equipment can be used in various types of applications, including corporate fitness app development, to improve the user experience and provide more personalized fitness tracking and guidance.
But how to build a fitness tracking app or how to build a yoga mobile app that allows users to connect to those devices, track their progress, and control their fitness devices using a smartphone?
Our team prepared this detailed guide for all Product Owners and developers involved in Bluetooth app development and fitness device connection to the React Native workout app willing to learn more.
We won’t just list out the code (that would take hours, and every product is unique). Instead, we’ll show you how Stormotion thinks, builds, and delivers, using practical examples and battle-tested strategies.
In this article, we’ll discuss:
- how Stormotion implemented a fitness app idea in React Native for our client, SportPlus;
- how to create a wellness app with Bluetooth connectivity in React Native;
- what are the differences between major protocols and the ways to identify and control the protocols (and the device itself);
- what are the potential pitfalls of each protocol and how to overcome them.
At Stormotion, we don’t just write code, we help clients find solutions to their problems. Our expertise lies in bridging the gap between complex device protocols and real-world product needs, co-creating with your team to deliver robust, scalable solutions.
Watch the video where Todd Gilligan, Innovation Lead of Force USA, shares his thoughts about our collaboration and the results his company achieved after building a fitness app.
Let’s start with a real use case: building a branded fitness device app for SportPlus, designed from the ground up for seamless BLE integration and user engagement.
🔧 Stormotion Expertise: How to Create an App for Fitness Device in React Native?
When SportPlus, a leading fitness equipment brand, approached Stormotion, their goal was clear: enable their customers to easily connect multiple types of fitness devices to a single, user-friendly mobile app.


Drawing from our experience in building a React Native workout app for SportPlus, we’ll provide insights into each step of developing such an application – whether it’s a fitness tracking tool or making a club management app with similar connectivity needs.
Step 1: Validate the Protocol
We decided to start with technical validation. Fitness equipment is rarely standardized; what appears as a single integration challenge can quickly become a landscape of multiple, often undocumented, communication protocols.
Our Approach:
We didn’t assume all devices would use the same protocol. Early device testing revealed at least three distinct BLE protocols in use. Rather than hard-coding for one, we designed a generic protocol handler.
- This system detects a device’s protocol dynamically by parsing characteristic UUIDs and unique identifiers from the BLE data stream.
- Once a device responds, the fitness app adapts and communicates using only compatible commands.
- If a device does not respond as expected, it gets disconnected, avoiding confusion or failed connections.
Let's summarize and see how it works in our case:
💡 We always stick to the Development Cosex, written by our CTO, Alex Bulavka. It says, “Deliver solutions, not code.” We question initial assumptions, validate real device behavior, and build scalable architecture.
Step 2: Wireframe the UX
In order to prepare the relevant design of the fitness app React Native, we began UX wireframing.
- Wireframes defined clear, intuitive paths for onboarding, device pairing, and workout tracking.
- We prioritized a minimal, distraction-free interface, putting important actions and insights within easy reach.
Why this matters:
For fitness users, frictionless device pairing and instant feedback are critical. The wireframe phase was not just about screens, but about removing ambiguity at every step.


Step 3: Develop the UI/UX Design
Our designers then brought the wireframes to life with a branded, motivating interface:
- Customizable workout dashboards, bold device status indicators, and accessible controls.
- Visual cues guide users when connecting, starting, or troubleshooting devices.
- Fitness app UI and UX was designed with accessibility and localization in mind. We made sure the app would be intuitive for users in any region or language.
From setting personal goals to switching devices on the fly, our designers crafted every screen to give users confidence and control over their fitness journey.
If you want to know how to create an engaging UI using React Native tools, read our article dedicated to this topic:
Also, we provide comprehensive services for building a personal training app from scratch, considering all your preferences.
Step 4: Initiate Frontend Development
With UI/UX in place, our developers transformed designs into robust React Native gym app.
- The frontend was architected for flexibility, supporting new protocols and devices with minimal friction.
- Modular components allowed us to scale or iterate without costly rewrites.
- The BLE connection logic was decoupled from UI logic, enabling faster troubleshooting and updates.
💡 Our Development Codex states, “Slow is smooth, smooth is fast.” We invested in thoughtful architecture early, knowing it would pay off in smoother iterations and fewer bugs.
Step 5: Execute Quality Assurance and Testing
Testing for SportPlus went far beyond the basics. Our QA Engineer, Ostap Shtypuk, conducted:
- Functional testing. We conducted testing to identify and address any bugs or issues that could impact the user experience. It’s the main type of testing we used to verify functionality, from logging into the account to connecting the equipment via Bluetooth.
- Non-functional testing, which includes:
- Performance testing. This testing ensured that our app could handle the demands of real-world usage without slowdowns or glitches.
- Compatibility testing. We tested our application against a range of fitness devices to ensure compatibility and consistency.
- Usability testing. We assessed the user-friendliness and intuitiveness of the app for its target users.
- Localization testing. We verified that the system functions work well when adapted to different languages or regions, ensuring a consistent user experience across diverse audiences.


At Stormotion, we're dedicated to finding solutions for every problem we encounter by exploring various approaches. For example, testing the active session flow of the SportPlus app was challenging due to the requirement of physical devices. However, we resolved this by implementing mocked devices, enabling testers and customers to assess the feature's appearance and functionality, even without access to physical equipment.
Ostap Shtypuk, QA Engineer @ Stormotion
We also thoroughly tested the interaction between the equipment and the mobile application. In projects involving interactions between several devices, ensuring a stable connection and seamless operation is paramount. Additionally, we asked a client to send us additional fitness devices to check the simultaneous connection.


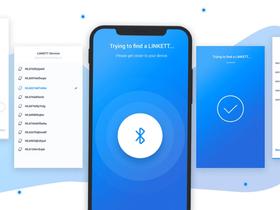
The testing phase ensures a smooth connection between the fitness app and the BLE equipment (image by Stormotion)
Long-Term Result for SportPlus
Our React Native app development service resulted in a robust, branded companion app that with seamless device integration and user empowerment. SportPlus customers now enjoy:
- Reliable, fast connections to their equipment, regardless of protocol.
- Intuitive onboarding, transparent device status, and easy workout tracking.
- Ongoing updates and support, thanks to a flexible app architecture built for the long term business growth.
📌 Understanding the cost of fitness apps is also crucial to ensure the project's financial feasibility and long-term success.
To better understand what to expect, you can explore the price of Peloton app development, which ranges from $92,050 to $145,000 depending on features and platform choices.
Curious how this approach can work for your product? Let’s explore your next steps together.
Contact Us
⚙️ BLE Hardware Details
💡 According to our Development Codex, “Surface knowledge is surface value.” We focus not just on how BLE works, but on how to make it work reliably for your app and users.
We've already described how Bluetooth works in our blog. Please take a look to revise your knowledge.
To keep it simple, we have a lot of different BLE devices. Each of them has unique services, descriptors, and characteristics to work with. Let’s take a closer look at this structure:
Device
The device has a few important fields, which could help us work with it:
Name | You can show the name somewhere on your UI for the users. You can filter all the devices by name only, but it's not the best way, especially for fitness devices. The devices are made by a lot of different manufacturers, and they might give them any name they want. Thus, be careful with it. |
ID | It’s a unique ID between the phone and the fitness device. It doesn't match between two different phones, and you can save it locally for easy reconnection. On iOS, an ID replaces the hidden MAC address, while Android provides direct MAC access. |
Characteristics
Characteristics are the main communication gateway between the Client (iOS and Android app) and Server (BLE device). Each characteristic has:
- UUID – That's the unique identifier, which you can use to distinguish characteristics among others. Some standard services use a 4-byte value within the format
0000{XXXX}-0000-1000-8000-00805f9b34fb(these 4 symbols ({XXXX}) differ in every characteristic), while others have fully custom UUIDs. - Value – A
base64string representing the characteristic’s data, which updates on read/write operations. - Metadata – Define what actions can be performed:
- Write Without Response – Sends data without confirmation.
- Write With Response – Sends data and waits for confirmation.
- Read – Retrieves data from the characteristic.
- Notify – Enables real-time updates from the device.
Looking for expert guidance on building the app for fitness device?
Contact Us
Characteristic Value
It doesn't matter whether we write or read data, we work with Characteric's value, which is a base64-string representation of Uint8Array.
To make transformations, we use base64-js:
Writing data: Convert a byte array to a | Reading data: Convert a |
These rules apply only to react-native-ble-plx. If you're using react-native-ble-manager, the package bytes are available without these conversions.
Understanding the complexity of BLE hardware is crucial when estimating the cost to make a Fitbit or any similar fitness app, as device connectivity can add complexity to the fitness and workout app development process.
🛠 How to Setup Bluetooth/BLE in React Native
As of autumn 2024, Expo Go doesn’t support BLE. However, if you compile your own Dev Client, react-native-ble-plx works without issues. To enable Bluetooth functionality in your workout app, you’ll need to either use a custom Dev Client or eject to a bare React Native project.
We suggest using react-native-ble-plx as the best solution for making the connection between a React Native app and a BLE device.
Please follow the installation guide for react-native-ble-plx:
- For iOS: Add BLE capabilities to your Xcode project;
- For Android: react-native-ble-plx don’t point out the differences in your AndroidManifest since Android 12. Thus, you need to add a few permissions and explicitly require them.
You can find more details in the official documentation: Bluetooth Permissions in Android.
Our Requirements
When working with Bluetooth, we should deal with:
- listeners (device connection/disconnection/subscription to data change);
- scanning (finding new devices, having the ability to connect to them);
- state management, etc.
Due to the hardware limitations, we should run scanning only once for a React Native fitness app. If we stop-start scanning in the application, we can break the Bluetooth connection.
Additionally, listeners should always be up-to-date. We want to prevent race conditions and state issues when updating it. The new value only applies in the next render, and it could break the app in the current one.
With these two ideas in mind, we understand that React doesn't really work well with it. States would lead to endless re-runs of the scanning process, our listeners wouldn't be up-to-date, and there may be a lot of other possible issues.
Of course, we could "hack" React: either use the refs all the way or just make all the dependencies empty. However, such manipulations make the code very hard to read and difficult to maintain since any possible change could break the way we work with it.
The best approach? A dedicated Bluetooth manager class handles hardware interactions, with a helper hook to update React state efficiently.
Let’s see how to implement it:
We'll use the same approach across all modules we create in our fitness app React Native. Let’s move on!
Enabling Permissions
Permission request differs for both iOS and Android:
- For iOS, the permissions are automatically asked.
- For Android, you need to ask for a few permissions. Until Android 12, it was only
ACCESS_FINE_LOCATION. Right now, they also needBLUETOOTH_SCANandBLUETOOTH_CONNECT.
📌 You can learn more about how to connect BLE device Android, in our guide.
For instance:
Scanning
To perform scanning, we first need to create a react-native-ble-plx manager:
We need to create it only once, at the start of the complete React Native fitness app development with BLE mobile app development services, because if we do it multiple times, Bluetooth wouldn't work well.
We should structure our scanning inside a separate class. The scanning will start only once, and all the outer dependencies will be replaced using refs. It’s the best approach, but if you'd like to keep it all inside the React hook (which we don't recommend doing), please take care of the following aspects:
- Before calling the next
startDeviceScan(e.g., when dependencies changed), we need to call.stopDeviceScan. If we don't do it, we fall into a memory leak. - If we call multiple start-stop-start-stop device scanning, your app might end up not being able to scan at all.
Too many dependencies can repeatedly trigger .startDeviceScan, disrupting Bluetooth stability. You need to be careful with it in your React Native workout app to make sure your Bluetooth connection is stable.
What can you do?
- Reduce the number of outer dependencies.
- If you have a state and you need to update it, use
setState(prevValue => newValue)syntax. In this case, you don't need extra dependencies withuseEffect. - If you have a state and you really need a previous value, use
useRef. It doesn't lead to rerenders, and you don't need to add it to youruseEffectdependencies.
Now, let's see how we can handle it as a separate class. We need to keep a few things in mind:
- We need to let our React Native fitness app know something has gone wrong.
- We need to update our state from our class.
addItemToList is a custom function that ensures there are no duplicates.
These two functions — changeOnSyncDevices, changeOnBleError — are custom changeOn functions, which are updated within useEffect. We need it because the dependencies might change, and it won't affect the constructor. We need custom useEffects to make sure we can update the handlers and listeners as we progress inside the React Native fitness app.
You might’ve noticed that we’re adding allowDuplicates here. It’s needed for a specific edge case. Without it, iOS won’t rescan the same device if you disconnect and reconnect it. Since iOS sees it as the same device, it won’t notify us when it reconnects.
With this code, we could run into a situation where we keep reconnecting to the same device multiple times. To avoid that, we can add a field to the class that tracks whether a device is currently connected. We also need to handle device disconnections properly to ensure we're not storing any devices that are no longer available.
You can apply any additional logic you want regarding scanning/connection. Just one thing to keep in mind – avoid extending your dependencies.
Navigating Between Screens
Inside your React Native gym app, you can see a few screens that require Bluetooth connection and work with devices, and a few ones that don't, which could be an important factor in your IoT project cost estimation. Thus, you might be tempted to start all the scanning operations on specific screens because it eases the process of retrieving/showing the data.
We don’t recommend doing it because multiple scan-stops might break scanning. Therefore, you should wrap all your code inside a context.
However, you should somehow understand whether you should actively scan right now. You can use another isActive field inside a class. To make sure it's up to date, you can use the listener updates within our hook.
Using this code above, every time you call useBleContext on a screen, active would be set to true, triggering automatic scanning. Once you leave this screen or switch to another tab, active will be set back to false, stopping the scanning process.
📌 For more information on managing Bluetooth connections in your app, check out our Web Bluetooth tutorial.
Need help integrating Bluetooth into your fitness app?
Let’s talk
🗂 Major Fitness Protocols: Similarities & Differences
You can treat the protocol as a special language for communicating between your complete React Native fitness app and the BLE device. It determines a few things:
- What you can do with the device.
- How you can accomplish your goals.
- Characteristics you can work with.
- When we need to send commands (basically
call .write()with some data).
In our guide, we'll talk about 3 different protocols used when working with fitness devices and how they can influence the
health and fitness app retention rate:
Let’s first talk about each of them in general, and then learn how we can seamlessly build them into the React Native workout app, avoiding extra pitfalls and headaches.
FTMS Protocol
FTMS Protocol has the largest number of available features. Here are some of the most important ones:
Few characteristics to write to Change level characteristic( | Receives workout changes via notification We monitor device characteristics and receive real-time updates. We don't need to do anything to receive a notification |
Has a characteristic to read from the device’s general data For example, whether it has an incline, resistance management, and how many levels are available ( | Enabled subscriptions Using a few characteristics, you can subscribe to receive info about the device/current resistance/whether the workout has started |
Number of situations when we can send a request:
| Has a lot of characteristics to subscribe to receive workout info — each for every type of device Rower ( |
How do we parse the received characteristic value? Imagine we received a notification from ROWER (2ad1). It's a base64 string which we can parse to an array of numbers. However, what we receive depends on the first two bytes:
[CONTROL_BYTE_0, CONTROL_BYTE_1, VALUE_BYTE_0, VALUE_BYTE_1, ....]
That's how it could look: [12, 0, 13, 6, 5, 3]. But how to understand what [13, 6, 5, 3] stands for?
It depends on the values we see in the first two control bytes. To work with it properly, we need to convert CONTROL_BYTE_0 and CONTROL_BYTE_1 to the binary system — [1100, 0]. Then, we need to take a look at each bit and check its value. The way you can do it is described in the
documentation.
For instance, our protocol says that if on bit 0 we have value 1, we have 2 bytes of speed:
- In case we have value 1 on bit 1, we have 2 bytes of distance.
- If we have value 1 on bit 2, we have 2 bytes of calories.
- Finally, in case we have value 1 on bit 3, we have 2 bytes of energy.
Remember that we take a look at the binary string in reverse. So when we want to know bit 1 - we need to do "0011"[1] instead of "1100"[1]
Let's sum up what we have for now:
| ➡️ | we don't have speed |
| we don't have distance | |
| we have 2 bytes of calories | |
| we have 2 bytes of energy |
Now, let’s take a look at our values — [13, 6, 5, 3]. The first two bytes are the "calorie" bytes — the calories are 13 + 6. Then, we have 2 bytes of energy, and we start not from the beginning, but from the end of the previous take. It'd be 5 + 3. Simply speaking, we shift our values.
RESPONSE: speed - not set, distance - not set, calories - 19, power - 8
However, if the CONTROL_BYTE_0 value is 10 instead of 12, we don’t have calories. If we turn 10 to the binary we receive 0101, which means that instead of calories we have distance:
RESPONSE: speed - not set, distance - 19, calories - not set, power - 8
Note: that’s just a basic example. Most of the time, the output value is not a sum. You’d rather have bytes summed with some multipliers. Therefore, this example is simplified on purpose.
To sum up:
What functionality do we expect from our protocol?
- Write to different characteristics under different circumstances.
- Read from one characteristic under some circumstances.
- Subscribe to different characteristics, and correctly parse the response, shifting the values.
Delightech
Deligtech is a very niche protocol. You can access its documentation here. Despite offering a range of important features, their number is quite limited, though different from those of FTMS.
- It has a single characteristic for both writes and monitors (
fff1). All the requests should be correctly prefixed to understand that we work with Delightech. - Even though we have one characteristic for all Delightech operations, we have different goals for writing. We distinguish the goal by our payload:
— When working with the info command, we pass 64 as the first byte of the payload. This command includes such info: start, connect, pause workout; user info (like weight), etc.
— When it comes to workout command, we need to "ask" this characteristic to send us a notification with an updated user payload. We pass 32 as the first byte of the payload. We run this command and receive a notification every second. We can change this number to any other. For example, we can send this command every 10 seconds and receive a notification every 10 seconds.
- Notification is sent only when we send the write command. Instead of subscribing to a real notification, we ping our BLE device every second.
To sum up, there are only 3 possible situations when we send requests to a BLE device:
- Establish a connection with a mobile app.
- Send user info.
- Get information about the workout (within this request, we also control whether the workout is active or not, and change the resistance/target speed).


Let’s talk a bit about parsing the values. Instead of shifting our values, depending on the first bytes, we ALWAYS expect them in the same positions. For instance, if we expect calories, they'll always be sent as the 6th byte, whether we have distance or speed, or any other field.
However, we have some exceptions here. Some fields might be empty for particular devices (for instance, when we run, we don't receive any rpm; or we won’t receive heart rate if we don’t use a heart rate sensor). We understand what fields are sent by taking a look at the CONTROL_BYTE. Imagine the following notification:
[CONTROL_BYTE, SPEED_HIGH, SPEED_LOW, CALORIES_HIGH, CALORIES_LOW, DISTANCE_HIGH, DISTANCE_LOW]
As you can see, we always receive the speed, calories, distance, etc. in the same position. If, for instance, bit 5 of CONTROL_BYTE is 1, we omit CALORIES_HIGH, CALORIES_LOW. We don't take a look at them at all.
The last thing: we can take a look at the notification we receive, and based on it, understand what type of device we work with (bike/treadmill/rower/etc). Some fields also depend on what type of device we work with.
To sum up:
- We need to be able to
.write()to the same characteristic under different circumstances (with different values). - We don't
.read()from any fields. - We need to subscribe to a single characteristic and every second trigger
.write()to receive a notification. We don't shift any values, but read them, depending onCONTROL_BYTE.
Yeekang/Fitshow/Thinkfit
Documentation on these protocols can be found here. However, it’s in Chinese so there might be some issues understanding it. The English version can be found here. Let’s review some key points of the protocol.
We have two different characteristics to work with. All the values we send/receive from characteristic should be prefixed with 2 first bytes — [0x02, 0x42-0x45]. The second byte marks the exact command we want to send/parse.
Also, we have a special characteristic to write to (fff2). Even though for all the writes we have a single characteristic, we have multiple possible occasions to send write:
- Connect to the React Native fitness app.
- Write a command to receive data about the device (available fields, max resistance, etc).
- Send the user's data (weight, height, etc.).
- Start the workout.
- Pause workout.
- Resume workout.
- Stop working out.
- Change resistance/target speed.
- Every second, send 2 requests to receive a notification about the workout.


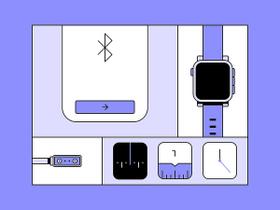
The connection of the fitness app with the BLE workout device keeps track of the workout performance (image by Stormotion)
When using this protocol, we don’t have any characteristics to read and have 1 to subscribe to notifications.
Workout notification is sent only when we send the write command, just like in Delightech. Basically, instead of subscribing to a real notification, we ping our BLE device every second.
Value parsing also works the same way as Delightech. Instead of shifting our values, depending on the first bytes, we ALWAYS expect them in the same positions. For instance, if we expect calories, they'll always be sent as the 6th byte, not taking a look at whether we have distance, speed, or any other field.
Yet, there are a few differences worth mentioning:
- As you remember, we send 2 requests, and we receive 2 notifications regarding the workout. They're prefixed with different bytes. For instance, we always have speed if the notification is prefixed with
[0x02, 0x42, 0x02]. No need to look at the specific bits. - We can't know the exact device. And the device doesn't change the response we receive.
To sum up:
- We need to be able to
write()to the same(fff2) characteristic a few times a second while the workout is in progress. - We don’t
.read()from any fields. - We need to subscribe to a single characteristic, and every time we trigger
.write()to receive a notification. We don't shift any values, but read them, depending on a few first bytes.
📱 Top Things to Keep in Mind When Enabling Multiple Protocol Support
Since now we know key points about each of the protocols, we need to make the fitness app React Native efficiently work with any of them. To make it happen, we need to focus on a few crucial things:
- We need to understand what kind of protocol we work with right now.
– We can't understand it by the device's name, because each manufacturer might come up with its name.
– We can't rely on users. 99.9% of the users don't know their protocol, and the app shouldn't break if the user misclicks.
-
We need to send specific write commands in each situation, attaching dynamic values (for instance, resistance, weight, or something else). These commands are mostly different for each protocol.
-
We need to parse the response and correctly understand what exactly our device has sent to us. It depends on the protocol because the responses have nothing in common.
Let’s take a closer look at these steps!
Step 1: Understanding What Protocol We Work With
Each protocol has something unique, which can help us highlight it among the devices.
- FTMS Protocol
The protocol uses unique identifiers. For instance, its bike- or rower-specific identifiers aren’t used anywhere else. Thus, if we receive a notification from a characteristic or read a characteristic with some FTMS identifiers, we can be sure it's FTMS.
- Delightech & Yeekang / Fitshow / Thinkfit
Both of these protocols use the same identifier. Moreover, this UUID (fff1) is widely used among other Bluetooth devices. Since we can't rely on the identifier, we should look at the value we receive. Protocols’ responses are always prefixed with the same fields.
We can write a protocol interface and basic implementation:
Here we state that the protocol might have an array of possible characteristic UUIDs, using which we can determine the specific protocol we work with.
Also, the protocol might have an array of possible characteristic UUIDs or an array of prefixes for the protocol. Using either of them, we can determine the protocol.
Also, we can specify protocol.helper.ts, which takes a Protocol and provides us with a way to understand that the device is of Protocol:
Later on, we can use the ProtocolHelpers inside our AppDevice to know if the device is of Protocol:
Having done this, we'll always have an available #currentProtocolHelper inside our AppDevice, which would make all the data parsing / .write() sends. If we don't know the #currentProtocolHelper, we can’t understand what protocol we work with. In this case, we can show some errors with a timeout.
Step 2: Sending Some Particular Write Commands in Specific Moments
Let's agree on what we mean by “particular commands”. It's just a write command:
- Sent to a specific characteristic.
- Sent with specific values (might be dynamic).
- Sent at a specific moment.
- Some commands can be sent only for some protocols.
A list of possible commands we might send consists of:
Each of these CommandType is used in at least one or more protocols. Inside our AppDevice, we specify our intention to send some information to the protocol.
This is where the tricky part happens. To send a command, we need to understand what protocol to send it to. At the same time, some protocols (Delightech and Fitshow) don't respond until we send the CONNECT command. How do we handle this chicken and egg situation?
Well, we could send the commands to all the possible protocols if their identifiers are available. So if we send the FTMS-like data to Delightech, they’d just ignore it. However, if we send Delightech data to Delightech, we receive a Delightech response and, thus, can use ProtocolHelper afterward. Simple as that!
Let's first update our protocol to let us know what command it can handle:
Here, for a Protocol, we determine commands by creating a record that contains all the CommandTypes we want to send to the protocol. We may not want to send one of the commands, that’s why it's Partial. We also may send a few requests within one command (for instance, for Yeekang/Fitshow/Thinkfit, we send 2 write requests every second to receive a workout notification).
Command consists of the UUID of the characteristic to send to (for instance, fff1), and an array of values. Each value can have a few different fields:
Hardcoded Fields | For instance, within the write command, we want to have 0x02 at the first byte, and 0x40 at the second byte |
Dynamic Fields | Can be target speed, resistance, weight, height, whether a workout has started, etc. We'll talk a bit later on how to pass them |
Checksum Fields | For some protocols, we want to have at some byte a sum of all the bytes before. That's why we have a separate field. We also pass the starting index because the checksum might not always start from the first byte (depends on the protocol) |
Here's an example of how it can look:
Then, we need to map these commands for every protocol to a definite array of numbers, which we could later use with Bluetooth:
And, finally, we can use it inside the AppDevice. Remember that if we don’t know the protocol and send a command, we should send it to every protocol.
You should be careful and send a lot of events with a delay. Android doesn't handle multiple .writes at a time well. The delay should be at least 200ms.
At this point, we have everything we need to work with different devices. We learned how to:
- send data to all the possible protocols;
- understand what protocol we work with based on the response;
- send data to the protocol we work with.
For now, there’s one last piece left to make it work. Let’s figure out how to process the workout response!
✅ How to Process Workout Responses
First of all, let's agree on our goals. The idea of this article is to teach you:
- Receive a notification with the workout data – done ✅
- Parse notification with workout data (burned calories, distance, speed, RPM, heart rate) – we're here.
- Store the workout data somewhere and maybe show the UI changes to the user.
To correctly parse notifications, we need to understand what distinctions and similarities notifications of different protocols have:
- Since we receive data under different characteristics, they have different IDs. Thus, we need to have it configured somehow.
- Each field (speed, calories, distance, etc.) might take up to 4 bytes. The output value would be a sum of all these bytes with some multipliers. For instance, we can have 2 bytes for the distance —
[1, 250]. The first one will have a 1000 multiplier, and the second byte – a 1 multiplier. So to find how far we’ve got, we need to sum1 * 1000 + 250 * 1 => 1250meters. We need to be able to mark multipliers inside our code. - Different protocols can send data in either the decimal or the hexadecimal system. We need to make our React Native gym app handle the field.
- The last important thing – where and when you should find the exact byte. As you remember, it differs a lot between Fitshow+Delightech and FTMS. In Fitshow+Delightech, we can always find the value on the same byte(s) if we have the required bytes/bits on the first few indices. In FTMS, the position of, for instance, distance, not only depends on the required bytes/bits for the distance, but also on the bytes/bits of the previous fields.
Talking about Fitshow/Delightech, the solution is straightforward here. We need to add a field telling which bytes should satisfy the response before we save the new value. For instance, we can add a separate BytePosition interface. It might also take the array of bits within the byte we need to satisfy the rules:
The field might look something like this:
Here we state that we want to save a new speed, if we received a notification:
- from characteristic
'fff1'; - when on the 0 index the value is 0x20, and on the 1 index the bits are 1 on 2 index, and 0 on 3 index.
Also, we want to have this field:
- in a decimal format;
- take it from the index 4th byte;
- take 2 bytes, and multiply them with
[10, 1].
Let's take a look at the example of how it could look:
| We don't save it because the 0x8 has the 0 on 2 index and 1 on 3 index |
| We save it because all the rules match. Using the multipliers, the new speed would be 110 km/h |
| We don't save it because of the UUID mismatch |
It works with Delightech and Fitshow since it allows for correctly understanding the values. However, developers have identified a few flaws with the FTMS. As you might remember, we have value shifts for the FTMS. For instance, if we have speed, we’ll have the distance at byte 4. However, if we don't have speed, we’ll have the distance at byte 2. And it goes crazier the more combinations we have.
In React Native development, there are 2 possible solutions:
- We can set up a special class/function to handle the offsets here.
For instance, we pass the characteristic array, the UUID, and all the fields we have, and it goes one by one in an array (starting with the first value), increasing the startingByte for all the next ones. Thus, we'll add a separate field sholudShift or something like this. It's a working solution that doesn’t have any serious downsides.
However, we don’t like to lose the flexibility and divide our parsing into 2 different pipelines, with only 1 flag changing the behavior. If we have another protocol with something in between, it might not work that well.
- We can have a special mapper function that makes all the offsets at build-time and leaves us with thousands of different matchRules, depending on what we have.
For instance:
- If we have no other values, look at the speed at byte 2.
- If we have only distance, look at the speed at byte 4.
- If we have distance and calories, look at the speed at byte 6.
- If we have distance, calories, and RPM, look at the speed at byte 8.
We'll have several rules like these for each field. During the parsing, we should find the appropriate matchRule. If we find it, we should look at the startingByte and make the computations.
With this implementation, our code for Fitshow, Delightech, and FTMS looks the same. The only difference is that the FTMS code is much bigger.
You can choose either of these solutions, but we used the second one, and didn't see any issues with it so far.
Let's take a look at how the mapper can look:
Here we have a simple switch on whether the field should be offset or not. If yes, we go through the positions, adding 1 rule to the existing matchRules and increasing the startingByte. Basically, the situation when we have ONLY this field (for instance, the speed at position 2) changes to the situation where we have every possible combination of fields. For instance, speed, distance, calories, speed, and RPM. In this case, speed is at position 10.
Let's take a look at how our Protocol might look:
Using the deviceFields, you can understand what fields you can work with and save them once you understand the protocol. Let's finalize and see how it could work:
Here we introduce 2 new functions – getNewDeviceField and getNewValue. We use them to:
- return the updated device field;
- understand what
matchRuleto use; - make sure all the necessary math is done to find the value.
At this point, we have everything to start building a fitness app React Native that correctly processes all the protocols, saves the values, understands the protocols, and has no issues adding another protocol as it won’t change any line of the code. In fact, we could even bring the protocols to some outer API and load them on demand to lower our app bundle.
🛑 Protocol-Related Issues
There are quite a few protocol-related issues, which we'll briefly discuss in this part.
Delightech
Let’s discuss Deligtech-related issues.
- When you disconnect the device from your React Native fitness app, the device turns off. Even though the device triggers all the "disconnect" events inside our code, it still has Bluetooth turned on for around 7 seconds.
Moreover, the device behaves with our Bluetooth as if it were turned on. It means that it's available for scanning. Default behavior would be as follows: we connect the device, disconnect it, receive the listener's calls, and then get notified once again that the device is available.
However, the disconnection process is already in progress. It means the device will NOT respond to our calls and won’t let us know it's off. Instead, we'll just behave with the device as if it's turned on. The solution is to have a delay between disconnecting and accepting the same scanned device.
- It’s a normal thing for many users to pause a workout. During the pause, all the values are sent as 0. So when we resume the workout, it goes back to 0. It means that if we were working out for some time, for example, rode 1 km and then paused, after resuming we'll have 0 in the account.
The solution here is to catch the paused behavior and store the values that need to be added up in a special state. Later on, we sum up the values before and after the pause. You can add a custom isAccumulative field to DeviceField to make it reusable.
- Don't send too many write requests to receive more real-time updates. If you send requests more often than once a second, your device will be disconnected. One second is a preferred interval.
FTMS Protocol
Let’s take a look at FTMS-related issues.
- You can automatically detect if the workout is paused. When the workout is paused, all the data is passed as 0. But when the workout resumes, it gets back to the initial value. It means that you should avoid these 0 values only when paused. As always, you can add an additional field to
DeviceField. - Even though we have a separate characteristic for each device type, not all the manufacturers follow this rule. You might have a few notifications from different characteristics within one device. For instance, if you exercise on a bike, you might receive values from bike, rower, and cross-trainer characteristics.
- FTMS doc doesn't share the characteristic UUID with us. You can take a look at them here.
Yeekang / Fitshow / Thinkfit
Let’s take a look at Yeekang / Fitshow / Thinkfit protocol-related issues.
- Don't send too many write requests to receive more real-time updates. If you send requests more often than once a second, your device disconnects. One second is a preferred interval.
- To "obtain movement" (distance/calories/count/time), the protocol says the first bytes are
[0x02, 0x43, 0x01]. However, it was[0x2c, 0x0b]. We're not sure if it's true for all the Fitshow/Thinkfit devices, but it might be useful to take a look at both prefixes and work with them.
Struggling with BLE implementation?
Reach out to us
🔄 Reverse Engineering: Getting BLE Logs Based on the Existing Apps
Right now you have all the information you might need regarding the architecture, setup, and protocols when creating a React Native gym app for fitness devices. The last thing to cope with is making the correct mapping for the devices. You can use the protocol, although it might not always be easy for you to understand what command follows what response.
If you have a device in place, you can connect using any existing fitness-related app to your device, and record all the Bluetooth logs.
Learn more about the integration of BLE devices into your React Native fitness app in our article:
You can go through the logs using Wireshark and understand all the Bluetooth commands you need to send and receive. You should have a fitness machine for that and an Android device (not available on iOS).
In case you don't have either of that, we would be glad to share with you a library of our logs here.
👂 Takeaways
As you see, React Native offers a powerful and efficient way to develop fitness mobile applications for BLE devices that work seamlessly across iOS and Android. Let’s summarize the key takeaways:
- The recommended solution for connecting a React Native app to a BLE device is using react-native-ble-plx. To manage Bluetooth permissions, scanning, and navigation between screens, you should use a separate class, with a helper hook wrapping it for state updates.
- Each protocol, FTMS, Delightech, and Yeekang / Fitshow / Thinkfit, acts as a specialized language for app-device communication. While FTMS offers extensive features, Delightech simplifies with single-characteristic operations, and Yeekang/Fitshow/Thinkfit ensures consistent parsing.
- Handling multiple protocols requires understanding unique identifiers, defining write commands, and employing parsing strategies. Notably, Delightech devices need a disconnect delay, FTMS protocols may reset values during pauses, and caution is advised with Yeekang / Fitshow / Thinkfit write requests.
- Implementing a generic protocol handler may offer a streamlined approach, promoting flexibility, adaptability, and scalability across various protocols.
By understanding the core concepts of Bluetooth communication and integrating with relevant fitness device protocols, you can build a feature-rich React Native fitness app.
If you’re looking for a Tech Partner to integrate your application with a fitness device of your choice, drop us a line and we’ll see how we can help you!

![Stormotion client Alexander Wolff, CPO from [object Object]](/static/a16ba3c9580effc3ab9a68d115eadffe/1b3aa/alex.webp)